Showing posts with label Sewing. Show all posts

30 December 2011

Traveling Art Tote

As many of you know from the Facebook page my family is venturing off to Costa Rica for a week on January 15th!!  Exciting right?  Well all but the part when the kids realize that the oh so exciting plane is really going to be 6 hours of BORING.  Luckily (or maybe not, we shall see) the only direct flight out of Denver leaves at midnight on any given day.  So the hope is to Benadryl the kids and they will sleep on the flight out.  But the flight back especially will be long for them.  And the two hours in the airport waiting to board flights as well. 

So I’ve been digging up ideas on traveling with children because this is the first trip we have ever taken with them.  And I came across some neat ideas on keeping their activities organized. However the frugal side of me was not willing to pay Etsy prices when I knew I could knock off this amazing tote myself.  Here are the art totes I made for the girls yesterday to keep all their coloring and books in one convenient place. 

IMG_8084

IMG_8086

IMG_8087

IMG_8088

I also plan to add some velcro today to the section inside the handles on either side to keep it securely shut when not in use.

IMG_8089


IMG_8090

IMG_8091


These are already getting use.  Though I’m trying to keep the stuff for the trip put away so it feels “new” when we get to the airport.  I think it will more fun for them if they haven’t already worn it out. 

These were so easy to make and I fully plan on posting a tutorial for you all but it may not be until after the trip.  Even beginners can sew this, it’s all strait lines!


~Sommer

29 December 2010

Love Stinks

Last year when I thought I was going to strike it rich making children's boutique clothing I came up with this darling little twirl dress for Valentines day.  Unfortunately that was before my blogging days and before I realized nobody wanted to spend the kind of money on children's clothes that I needed for it to be worth my time. 
So I am going to make some more this winter out of jersey knit and I will document the in’s and out’s so you can follow along!
I have a Singer sewing/embroidery machine and stitched up this cute little stinker for the front ;P

Then layers of ruffles in white and pink hear prints turned into this….

I have the best little model on the planet which definitely helps but the dress truly is one of a kind and both my girls still insist on wearing it when snowflakes are falling.

27 October 2010

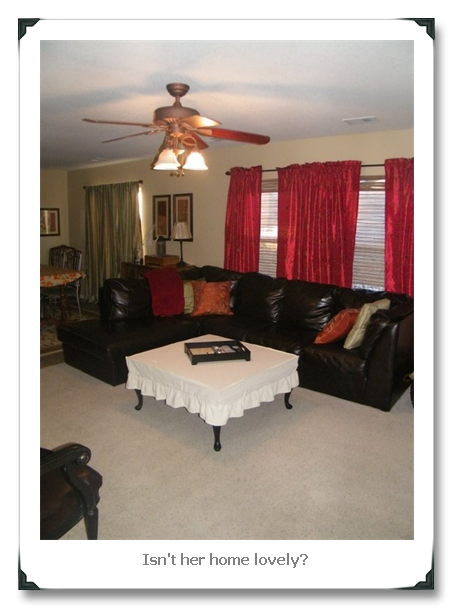
Ottoman Slip covered

I told you all last week that I went to upholster an ottoman and it didn’t go so well.  That is when I ended up with my beautiful new musical wreath instead.  It would seem we either need a wider crown staple for using drop cloth to upholster with, or we need a tighter weave fabric because the fabric kept popping right off the staples!
DSCF1929 DSCF1931
You can see my girlfriend decided to make her ottoman out of a square coffee table.  She order high density 2in foam for the top.  But with our little staple problem we brainstormed how else to tackle this table gone ottoman.  Then it came to me… A SLIP COVER!  I swear I could slip cover my life some days lol.
Here is what you’ll need:
  • A few yards of fabric (we got drop cloths from the hardware store)
  • Scissors
  • Existing ottoman or table
  • Sewing Machine

First we measured and cut our square.  We had a 38.5x38.5in piece.  Then we wanted the sides 9in total in length but half fitted and the bottom half ruffled.  So we four pieces (one for each side) 38.5in long by 5in wide.  Then we cut another set the same and set those aside (those will be the ruffles.  Now pin the first set of strips onto your square.
IMG_5056
Make sure your corners line up.  You will sew the long sides to your square first.  Then you will sew down these corners until you meet the seam from the other direction.  I used a strait stitch for all of these.
IMG_5059
IMG_5058
Next we sewed French seams since we didn’t have any cording to use.  A French seam is when you sew wrong sides together, then flip and sew again right sides together.  It’s a stronger reinforced seam.  Normally the rim it creates is on the inside of the article but in this case we did it backward so that this would create our trim. 
Here is the first side we sewed.  This will be the inside of the slipcover in the end.
IMG_5061
Now flip it over and sew along the same lines you just did on the other side.  And it will look like this…
IMG_5062
This is going to be right side out.  Now strait stitch alone one side of those other four strips you cut.  Gather them so they are 38.5in and sew them onto the raw edge you see above.  Here is a tip.  Drop cloths have hemmed edges already!  So I used all the hemmed edges for my ruffle so I wouldn’t have to finish the edges, it was already done for me!
Here is what it looks like with the sides and ruffle attached…
IMG_5064
And in place on the table/ottoman =)

07 October 2010

Dining Chair Slipcovers

If you have kids you know exactly what I mean when I say a kitchen table and chairs are one of the dirtiest places in the house.  Of course it's also the best because this is where we eat three times a day, play play dough, paint, make sugar cookies, play cards and a about a hundred other things that I enjoy doing with my family. 

So for a while now I've thought about how I can cut down on the cleaning in this space of my home.  It's always filthy.  The table has gunk glued to it, the spindles of the chairs look like something is growing on them and on any given day I can usually sweep up enough crumbs and food off the floor to create another meal entirely!

I don't care for seat cushions but I thought and thought and finally thought up a way to cut down on the grime at the table.  I created slip covers for the chairs that I could just pull off and wash at a moments notice!  This is especially great for the nights we have company.  Or I can leave them off all together but they are so neat I don't think I will =)

I have 6 chairs and the backs measured 16in across by 15 in tall.  So my fabric guidelines will based on this. This was a pretty simple project so I don't have many pictures of the "process" but I'm pretty sure you'll get it.

Here is what you will need:

3 yds fabric
Sewing machine (you may be able to make these with fabric glue but since I'm a sewer I don't know any no-sew methods sorry)
Scissors

Step 1:  When you get your fabric it will be folded in half.  This is how it's wrapped on the bolt.  You will add 1in to each of your measurements for seams.  I made a 3 in ruffle on mine so you will subtract 3in from your length first. Then add 1in for seam allowance.  So 15in-3in+1in= 13in.  Now measure 13in and cut long ways all the way down your fabric.  Set the raw edge piece aside.  You will use this for your ruffles.

Step 2: Take the fabric with the fold and you will make six 17in cuts all the way down your fabric keeping the fold in tact.  To cut down on sewing I am using the fold as the top of the slipcover.  Now you will only need to sew a strait stitch down each side leaving the bottom open. 


Okay hopefully you can see the each side has been stitched up and the top is the folded part.  Now the ruffle.

Step 3: Making the ruffle.  The open part of your slip cover will measure 16in.  But to get the ruffle all the way around you will have to double that for both sides.  So now were at 32in.  You will want your ruffle to be one and a half the length of your opening.  So 32in+16in=48in.  Now that long piece you cut in the beginning from the bottom of your fabric you will need to cut into 6 48in sections that are 4in wide.


Step 4:  Start by folding over one side about 1/4in and press with the iron.  Then fold again another 1/4in and stitch to make a nice finished hem/edge.  Run a strait stitch about 1/4in down one side of your 48in strip.  Only back stitch the start.  At the other end leave a couple inches of thread when you cut it off.  You will pull the back side of the thread to "gather" your ruffle.  You want your finished ruffle to measure 32.5in or so.  Remember to account for seam allowance!  Tie off the unfinished end and now you will stitch the two ends together.  It will look like a ruffle skirt with a big opening.


Step 5: Turn your slipcover right side out and keep your ruffle inside out.  Slip your ruffle over the open end of your slipcover so that both raw edges meet up.  Sew about 1/4in from the edge to attach your ruffle to the bottom.  Flip ruffle right side down and iron flat.  Your done!  That's it.  Now you can embellish or iron on some pretty stuff like I did.  Get out your fabric paint, whatever melts your heart =)


26 April 2010

Book sling

Now this is a very neat idea!  A blog stalking buddy of mine sent me a link to a blog that had this great idea!  I made this today for my lil'miss K. 


If you want to make one for yourself check out the original designer at PennyCarnival.

Welcome

Hello everyone!


I started this blog because I was going absolutely crazy with all the great ideas out there for home decorating and fun crafts that you can make for pennies on the dollar.  After calling friends and family and posting information on facebook I decided it would be a good idea to start logging all these great projects in one place.  Now you can come to look up tutorials and post your own ideas and comments.


I'm starting off with these great drawstring bags!  I love these because they are so versatile.  You can make them in any size or fabric to suit your mood and decorating space.  I have made these bags in the tutorial as birthday goodie bags.  I have also made these bags for crayons, markers, hair ties for my girls, make up... the list goes on!  Get creative and these bags will help get you organized.


What you'll need to get started

  • Fabric (I'm using 10x20 for these goodie bags)

  • Scissors

  • Cutting mat

  • Rotary blade (or scissors)

  • Sewing Machine

  • Embellishments if you desire

  • Ribbon (2x 1.5 the circumference of your bag)
1. First you'll want to cut your fabric to suit the size bag you're looking to achieve.  I will be cutting 10x20in for this project.    
                                     
2.  Next turn your fabric right sides together and sew a strait stitch up both long sides.
3.  Turn your fabric right side out and press seams.
3.  Now turn your short sides over about 1/2 in and stitch.
5.  Step 5 is optional.  If you want to add an embellishment this is where you'll do that.  Place your embellishment about 1in down from your stitched edge and run a basting stitch down the center of it. 

                                    
6.  Now turn your short ends over about an inch to create your casting and zig zag stitch it in place.

                                    
7.  Now fold your bag in half so both casings are face to face.  The inside of your bag will be facing out now. 

                                   
8.  Stitch up both sides and stop about 1/4 in from your casing.  This will make it easier to insert your drawstring.
9.  Turn bag right side out, push out corners and press seams.
10.  You will need two pieces of ribbon approximately two and a half times the circumference of the bag opening.  So my opening is 20 in around I will need two 30in pieces of ribbon.

                                   
11.  Now attach a safety pin to 1 tie and thread through both channels, working left to right. Do the reverse with other tie, threading from right to left.  Tie off the ends and pull!
                                                                               
If you enjoyed this tutorial please leave a comment.  I would also love to see your pictures! 


You might also like

Related Posts with Thumbnails