Now mine didn't turn out quite like hers because when I started that day I couldn't for the life of me recall which blog I saw this idea on or what the name of that darn window curtain box thing was called! So I winged it! And aside from a few oversights it turned out a okay!
So first I took a large size uhaul box and cut down one side so I could open it up flat like so.
Then I wrote down my measurements. Now this is where I goofed. Because I had my depth for the sides but I didn't account for the brace pieces that I would tack into the wall so instead of 59in I should have added another 2in to each side! My bad. Now instead of a perfect box over the window it's more of a half rounded circle kind of box lol.
Now I cut these flaps off to tape onto the seams where the box used to have corners to stabilize those weak points.
Then I measured the length I needed and cut off the excess.
This was one of those flaps we cut earlier. I had a few left over that I didn't need to brace the weak sections of the box. These will be taped on with duct tape to make the sides of your box.
Just in case you didn't get it before I thought I'd show you both sides haha!
Here you can see on the left where I taped the side on and now I have hand drawn the pattern I want for the bottom of my valance.
Now I admit this ended up looking pretty awesome. But let me make a note to self... draw a simpler pattern next time! This was a nightmare trying to wrap fabric around!

Here is the window before.
Here it is after. We re-hung the net under the box and draped it over the bed. Sorry I didn't stage it perfectly for you but this room has been in overhaul mode lately and I have tons more to show you once it's complete. So this is just for the pelmet box.
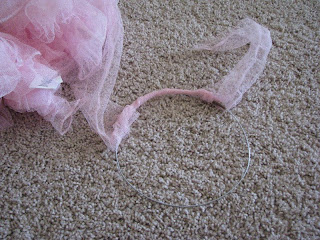
When we were finished the netting was too long since it was not longer hanging from the ceiling. So we had to cut a couple feet off the bottom of the net. I couldn't stand to throw it away of course so we made these!
Princess tiaras!
We wrapped the yards and yards of netting around some 14g wire I had in the garage and left a long tail on the back.
 |
We also added silk flowers to them and now my girls haven't taken them off for days!
(Oh and seriously you can't rotate photo's in blogger?) Yet another note to self. Sorry I'm too tired to go fix this tonight. You get the idea.


3 comments:
Hi! I think your pelmet came out so sweet and charming! Great job and so creative! Thank you for stopping by my blog and for your comment on my vintage french bathroom remodel~ you asked about where I got the towel rack above the bathtub~ I found mine at my local Ben Franklin- our Ben Franklin has the BEST decorating elements! I have seen the same rack at T.J. Maxx also. Good luck in your quest!
Have a great day! :)
DOESN'T THE PHOTO ROTATING THING DRIVE BONKERS????
Ahem...
I've been tromping willy-nilly through your blog, and you have some very cool stuff going on over here. Consider me a follower. And thank you for the super sweet comment over at my insanity; it made my day.
Courtney thank you! I want one of those towel racks so bad I can taste it!
Sunny- I'm so glad to see you here! I have to tell you I was cracking up over at your blog. I just love your sense of humor. I'm so excited to have here to liven things up ;P
Post a Comment