

What you’ll need:
Foam board (12x12 square)
Lot’s of sheet music
Brown Ink Pad
Stapler
Scotch tape
Hot glue
Silk flower of your choice
Step 1: Cut your foam board down to 12x12 if it didn’t come in that size. Then you will draw 4 layers of circles on it like the photo below. They don’t have to be perfectly spaced but just try to get close. Use plates, masking tape, cups etc… to make your circles. Click photo to enlarge.

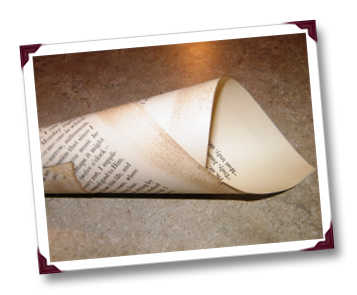
Step 2: Set aside your foam board. Now you will start inking your pages. You want to turn your inkpad face down and run it along each edge of your papers to make them look aged. Here is the ink I used.

Step 4: Staple the bottom of the cone flat. This just helps with gluing it onto your foam board.
Step 5: Glue. Start with your most outer ring and start aligning the tips of your cones to meet up with the first line in the circle. Note.. this will not be the outer most line, it will be the next one in. Start by gluing one cone at North, South, East and West. Then disburse them as evenly as possible. Once you get to the last of them you start noticing some gaps. You can layer a few to fill those in before moving onto the next ring.


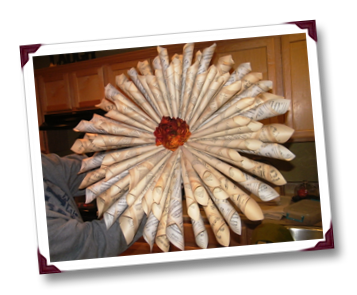
Here is the finished product =) It’s up to you if you want to continue filling in cones where you see small gaps. I also added leaves. Enjoy!


2 comments:
hi hon, did you use just the ink to make the papers shade in diff colors, or did you use different papers to print on?
xxx
m.
Hi Monika... The pages were from different books. I have some music which was newer paper and those build the large cones around the outside. Then the smaller ones in the middle are from a Jane Eyre book that was about 70 yrs old. So the papers themselves had discoloring from age. I only inked around the edges of the pages to give it that extra patina. Hope that helps! If you need to age your pages and make them look older than they are you can do this with tea bags. Just take a large tea bag and soak in two cups water then pour it into a baking dish and lay your paper in there for about half an hour. Then dry flat and iron with a towel over top of it. It will give it that yellow/brown color.
Post a Comment